WIFI AUTHENTICATION USING IAS AND ACTIVE DIRECTORY
Authenticate wifi users with Active Directory through IAS.
Software/Hardware Requirements:
1.Windows Server 2003 Standard Edition with Active Directory and IAS Installed.
2.RADIUS enabled Wifi router or switch.
3.Wifi client (Windows XP SP3 Preferred)
Install IAS
Windows Server 2003 doesn’t come with any extra services installed by default for security reasons so you’ll need to manually install IAS. It’s fairly simple if you have the Windows Server 2003 install CD. To install IAS, simply open “Add remove programs” from your control panel and select “Add remove windows components”. You will see the following window (Figure OO) so you’ll need to scroll down to “Network Services”. You don’t want to just check it because you don’t want all Network Services installed, just highlight it and hit the “Details” button.
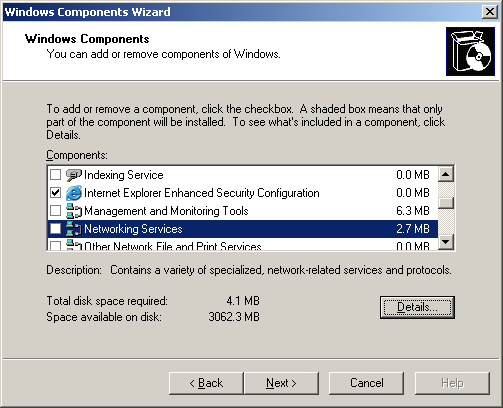
Figure OO
|
Networking services
|
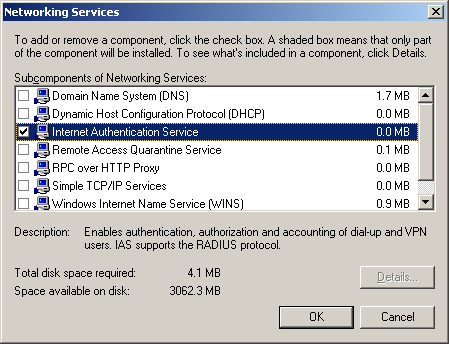
Once you get to the screen shown in Figure PP, scroll down and just check off “Internet Authentication Service” IAS for short.
Figure
 PP PP |
Internet Authentication
|
Once you’ve installed IAS, you’ll be able to launch IAS from your Administrative Tools either from the control panel or from the start menu. You’ll see the following interface. (Figure QQ)
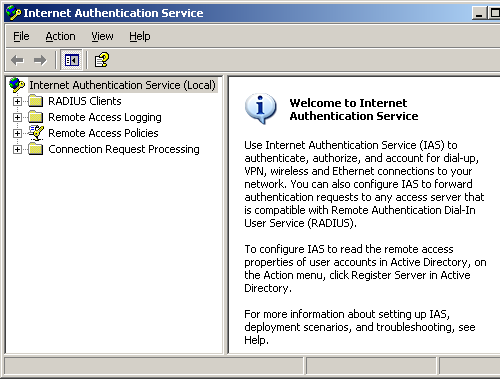
Figure QQ
|
Service
|
Set logging policies
The first thing we’ll do is look at and set the logging policies (Figure RR). Right click on “Internet Authentication Service (Local)” and click Properties.
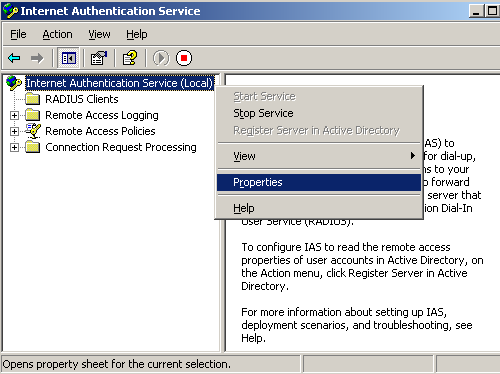
Figure RR
|
IAS Properties
|
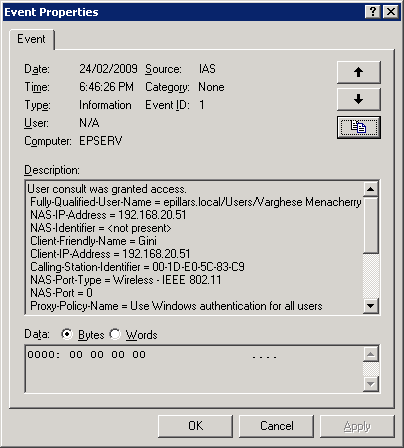
You will now see the screen in Figure SS. If you check off the two checkmarks here, you will force IAS to log successful and reject authentication requests to the Windows Event Viewer. If you’re intending to use text or SQL based logging, you don’t need to check these unless you want the logs showing up in both places.
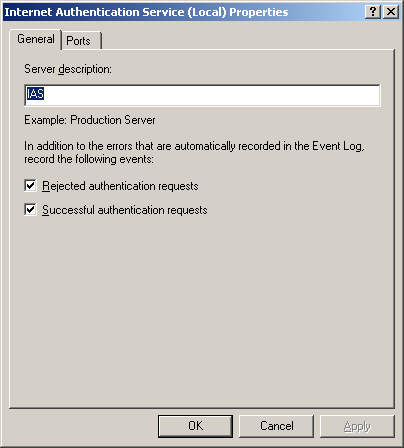 Figure SS Figure SS |
Local Properties
|
If you click on the “Ports” tab, you’ll see the screen shown in Listing TT. These are the default RADIUS ports and you should generally leave them alone for standardized RADIUS conventions. Microsoft IAS will actually listen on two sets of ports. The lower number ports are the more traditional port numbers, Microsoft applications prefer the higher number ports. You should generally leave this setting alone as is.

Listing TT
|
Ports
|
This next part lets you set the standalone text and SQL logging capability of Microsoft IAS. You right click on “Local File” under “Remote Access Logging” page and hit “Properties”. (Figure UU)
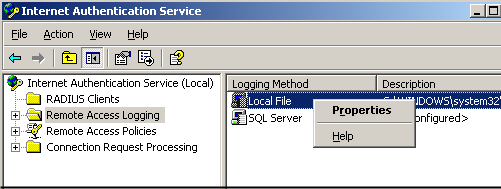 Figure UU Figure UU |
Remote Access Logging
|
The first “settings” tab lets you set what events you want to log. (Figure VV)
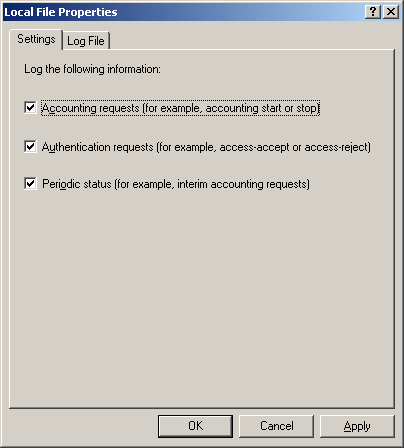 Figure VV Figure VV |
Local file properties
|
The “Log File” tab lets you set the file format and the log size limits. (Figure WW)
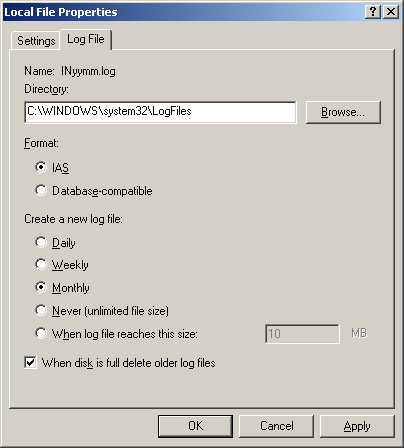 Figure WW Figure WW |
Log file
|
We won’t go in to SQL logging in this article because it gets rather complex to set up a SQL database. You have to manually create the accounts and tables in SQL in order for this to work. Furthermore, IAS under Windows Server 2003 insists on stopping the RADIUS service if logging doesn’t work so if the SQL server doesn’t respond, all of your RADIUS servers stop working. Unfortunately, Microsoft doesn’t give you any way to override this “fail-shut” behavior because they claim customers want it this way because it’s more secure but every customer I’ve talked to wants a choice on this behavior.
There is no security risk because the Authentication and Authorization component of Microsoft IAS is working perfectly fine, it’s merely unable to make a record of the transaction. I’ve spoken with Microsoft and they’re telling me they will correct this with Windows Server 2007 (or whatever it’s going to be called when it’s released next year). Hopefully they’ll automate the SQL database creation process with a script too.
Add RADIUS clients
A RADIUS “client” is not what you would typically think of as a “client” as in a user. A RADIUS client is something like a wireless access point, a router, a switch, a firewall, or a VPN concentrator. Any device that provides network access that needs to delegate AAA (Access, Authorization, and Accounting) to a RADIUS server is considered a RADIUS client. For the purpose of this tutorial, we’ll set up a single access point as a client.
To start, we’ll right click on “RADIUS Clients” and select “New RADIUS Client” as shown in Figure XX.
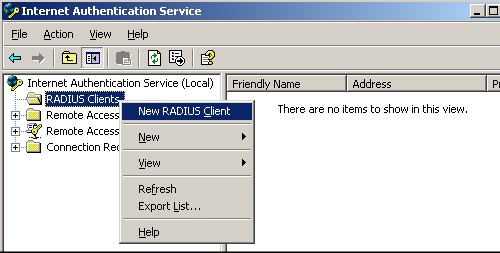 Figure XXRadius Client
You then get the screen shown in Figure YY where we give the device its name and set the IP address of the access device which in this case is an access point. Be aware that if you’re talking about a router or firewall that has multiple IP addresses because it has multiple interfaces, you must configure the IP address that is closes to the RADIUS server. This is because the RADIUS request is seen as coming from the closest interface on a multi-homed access device and if you configure the wrong IP, it will not be able to communicate with the RADIUS server.
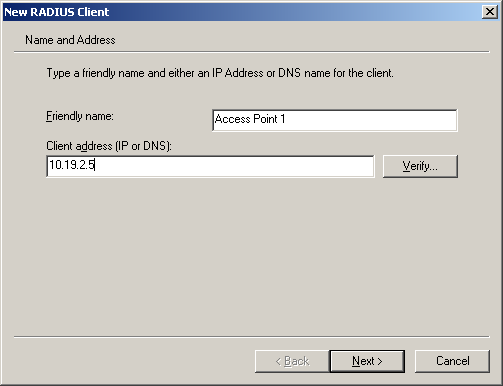 Figure YY Figure YY |
New RADIUS client name and IP
|
Then we set the RADIUS type and RADIUS secret. The RADIUS type is almost always set to “RADIUS Standard”. Cisco devices are the exception and you must select “Cisco” for the “Client-Vendor” field if you want your Cisco devices to work. There are exceptions like Cisco wireless switches because the switches were acquired from Airespace in 2005.
Airespace wireless switches use “RADIUS Standard” like everyone else in the industry. The “shared secret” is the secret shared between the RADIUS server and the access device (Figure ZZ). Try to make the secret 10 characters or more comprised of random numbers and letters. Avoid spaces and special characters since that might have incompatibilities in some devices and software and you’ll have a rough time troubleshooting.
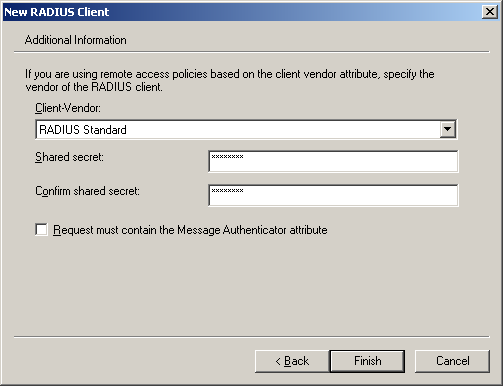 Figure ZZ Figure ZZ |
Setting the shared secret
|
Click “Finish” to complete. You’ll need to repeat this for all of your access devices.
Add remote access policies
Now we need to create a remote access policy to authenticate and authorize the user trying to access our access devices. To do this, right click on “Remote Access Policies” and click “New Remote Access Policy”. (Figure AAA)
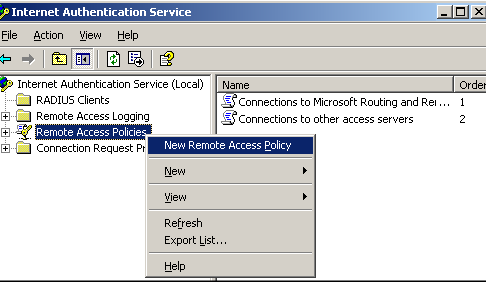 Figure AAA Figure AAA |
New Remote Access Policy
|
Click “Next” to move to the next screen (Figure BBB).
 Figure BBB Figure BBB |
Policy Wizard
|
Give your policy a name and use the wizard. Hit “Next”. (Figure CCC)
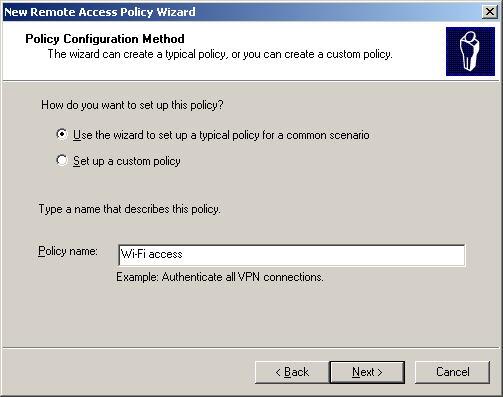 Figure CCC Figure CCC |
Policy Name
|
Choose “Wireless” and hit “Next”. (Figure DDD)
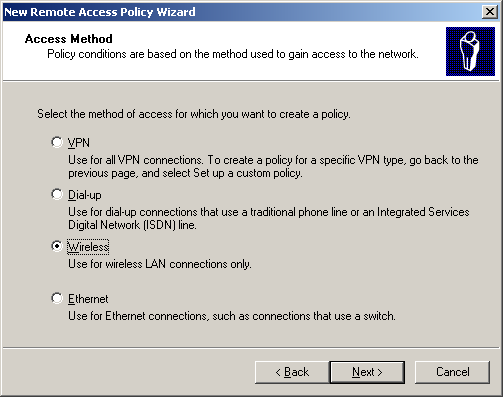 Figure DDD Figure DDD |
Wireless
|
Here you’ll need to grant access to your users and computers. Hit “Add”. (Figure EEE)
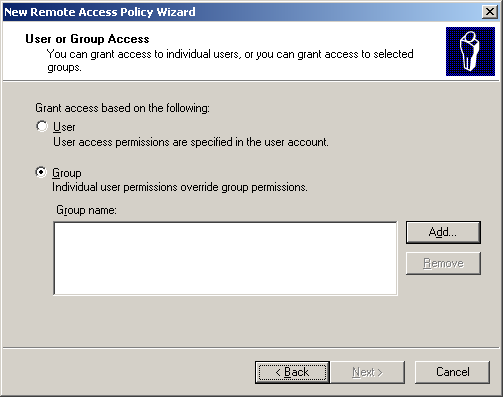 Figure EEE Figure EEE |
Group Access
|
Here you’ll need to adjust the location to your domain. Hit “Locations”. (Figure FFF)
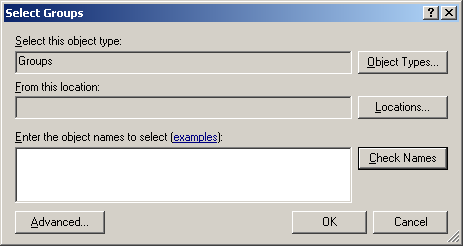 Figure FFF Figure FFF |
Select Groups
|
Choose the domain you’re trying to authenticate to and hit “Ok”. Note that the IAS server must be joined to the domain you’re authenticating to or a trusted domain. (Figure GGG)
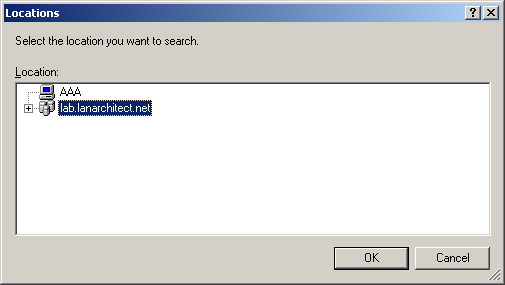 Figure GGG Figure GGG |
Select Location
|
Type “Domain Users” and “Domain Computers and separate them with a semicolon. (Figure HHH) Then click on “Check Names” to force it to underline and validate your entries. You may of course restrict access to a smaller group of users and computers since the following option allows all domain users and all domain computers to connect to your wireless LAN. Hit “Ok”.
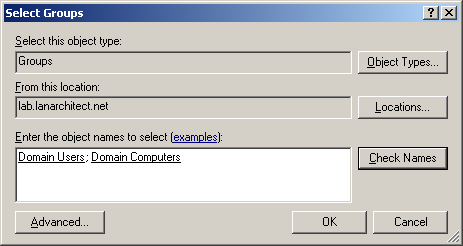 Figure HHH Figure HHH |
Enter domain
|
Note that “Domain Computers” is used to authenticate your computer for “machine authentication” which connects your wireless PC before the user even logs in. This is a very useful and unique benefit of the Windows Wireless Client since it emulates the full wired experience for wireless users.
If “machine authentication” isn’t implemented, group policies and login scripts won’t fire off. Furthermore, only cached users can login to the wireless computer, because users who have never signed on to that PC can’t authenticate with the domain. For this reason alone is enough for me to always recommend using the Windows Wireless client for Windows users not to mention the auto-deployment capability.
Now you see the screen shown in Figure III with a summary of the user and computer groups you’re allowing access. Note that this is an OR operator between these two group names. Either one true registers a success. Hit “Next”.
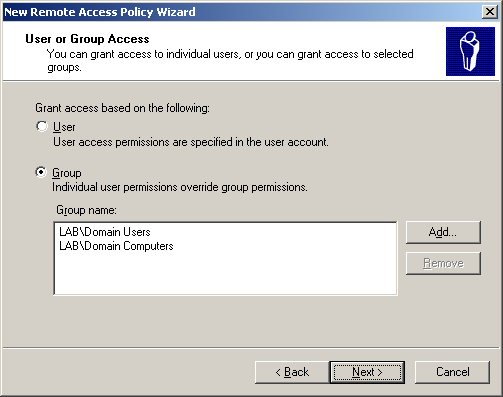 Figure III Figure III |
Group access defined
|
Choose “Protected EAP (PEAP)” authentication. Then hit “Configure”. (Figure JJJ)
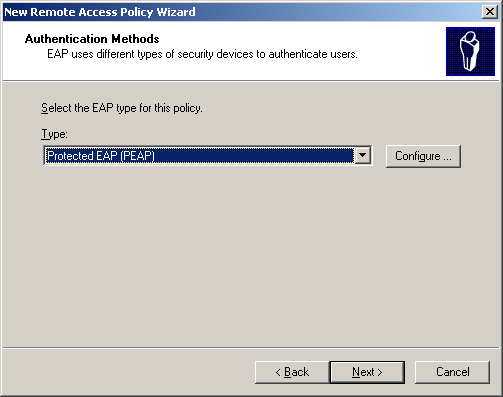 Figure JJJ Figure JJJ |
Authentication
|
Before you get to this page, you must either have a valid Machine Certificate from a Certificate Authority or you have already self-signed one yourself. Leave the rest of the settings like you see in Figure KKK and click OK.
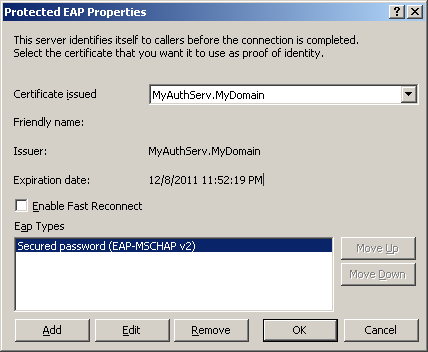 Figure KKK Figure KKK |
PEAP Properties
|
Download & install Microsoft IIS Resource Kit and create new self signed certificate if it is not there.
Finalize the remaining dialog box and you’re finished making a new wireless authentication profile. Now we’ll move on to fine tuning the configuration.
Tweak remote access policies
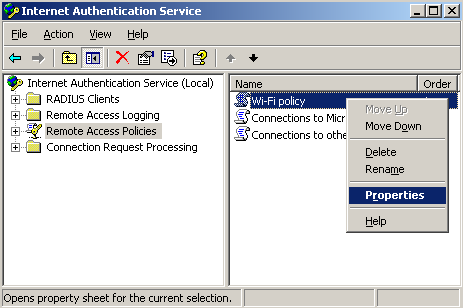
Once you complete the previous steps, you’ll see a new Remote Access Policy called whatever name you gave it. The two default policies you see in Figure LLL the one we created are just there as samples and are disabled by default. We’ll right click on it and hit “Properties”.
Remote Access Properties
Figure LLL
You’ll notice there are two “Policy conditions” shown in Figure MMM. Note that there is an AND operator operating between the two conditions. That means both conditions must be true or else the policy spits out a rejection and it moves on to the next “Remote Access Policy”. The first policy forces “Wi-Fi Policy” to only permit users coming in from 802.11 connections. The second policy is the permissible user or computer groups we set earlier. Click on “Edit Profile” to continue.
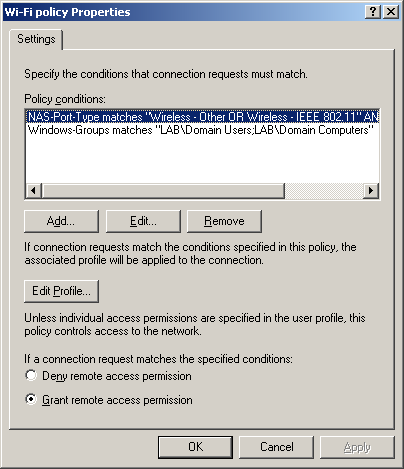 Figure MMM Figure MMM |
WiFi Policy Properties
|
The “Dial-in Constraints” tab lets you set the dial-in and session limit restrictions (Figure NNN). It also lets you restrict the times people are allowed to log in.
Remove the Domain Computers if you want to restrict other users .Otherwise any user can use the network
from a domain Computer without logging to domain.
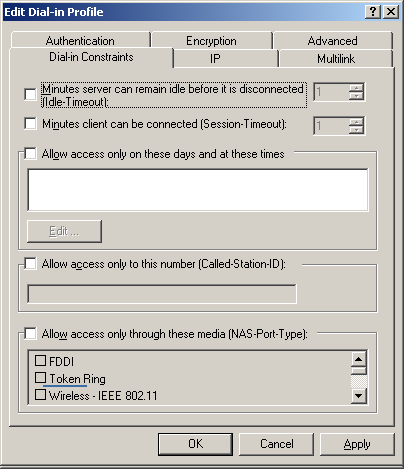 Figure NNN Figure NNN |
Dial-in Profile
|
The “Encryption” tab is important for security (Figure OOO). You must uncheck the three insecure checkmarks to enforce maximum strength encryption.
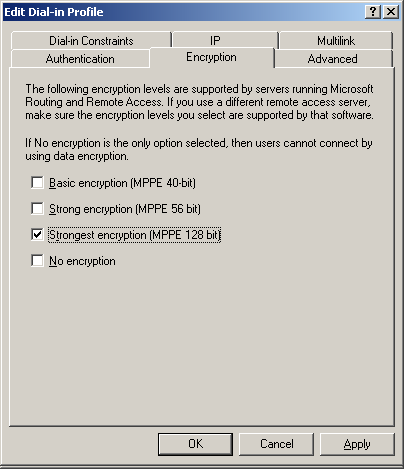 Figure OOO Figure OOO |
Encryption
|
The “Advanced” tab (Figure PPP) is something we won’t go in to now, but note that this is a very powerful tab for advanced features. With special RADIUS attributes configured on this page, you can do things like tell your Cisco VPN concentrator what user group a user belongs to so that the concentrator will set VLAN and firewall policies on that user matching their group rights. You can also do things like set VLANs or group association for an Aruba wireless switch which has a built-in firewall. We’ll leave the details for a future advanced RADIUS configuration article.
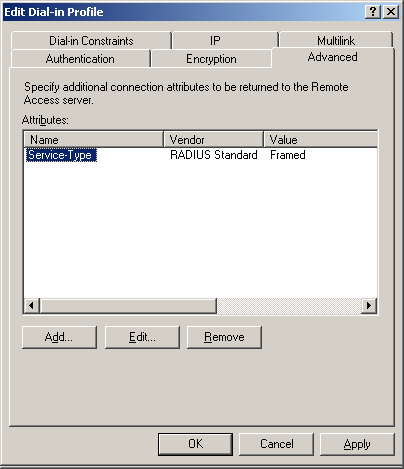 Figure PPP Figure PPP |
Advanced tab
|
Under the “Authentication” tab, you can tweak the EAP methods (Figure QQQ). For wireless LAN PEAP authentication, you actually leave all the checkmarks alone. These settings are for more traditional RADIUS applications like a modem dialup service provider that proxies to your RADIUS server. Let’s click on the “EAP Methods” button to see what it has.
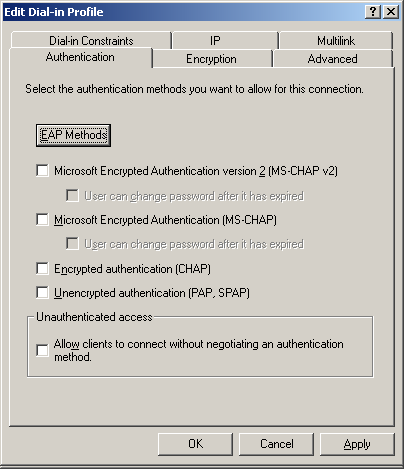 Figure QQQ Figure QQQ |
Authentication
|
Here you can edit the PEAP configuration. (Figure RRR) We already set these settings during the initial policy wizard. Click “OK”.
 Figure RRR Figure RRR |
EAP Providers
|
You’ll need to click OK one more time to get out of the Dial-in profile window.
This final section in the IAS interface is something we won’t do in this article. (Figure SSS) I just wanted to give you a preview of what it does. The “Connection Request Processing” section lets you set advanced RADIUS relaying features. You have granular control of what kind of RADIUS requests you want to relay off to a different RADIUS server and which RADIUS requests you want to handle in the local “Remote Access Policy” engine.
You can even configure groups of RADIUS servers that you want to forward to. This allows IAS to participate in a multi-tier RADIUS environment. For example, if you have a user that isn’t in your domain belonging to a business partner’s network that needs guest access to your environment, you can forward to the RADIUS request to your business partner for them to process. There are even Universities that honor each other’s students and staff by allowing a student to securely log in to any campus participating in the network.
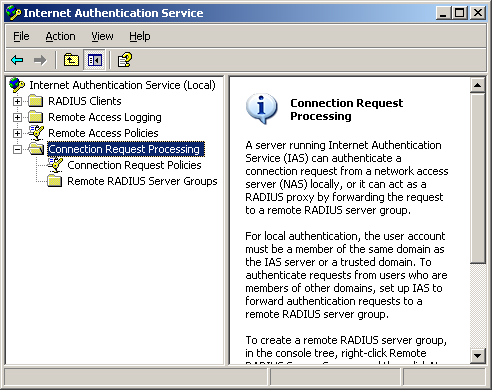 Figure SSS Figure SSS |
Connection Request
|

Figure TTT
If you want to enable active directory authentication you have to register the IAS server with Active Directory.

Figure UUU
You have to enable dial-in access permission for all the uses those who will use the wireless network with Active Directory authentication.

Figure VVV
Backup and restore IAS policy
Finally, after all this work we want to be able to backup our RADIUS configuration and maybe even restore it on to a redundant RADIUS server. Microsoft gives you a simple command line tool for exporting and importing the RADIUS configuration.
To perform the backup operation, simply run the following command.
netsh aaaa show config c:IAS.txt
Note that you can use any name for the file. You can use that file locally if you ever screw up the IAS configuration and you want to rapidly recover or if you want to copy the IAS setting to another IAS RADIUS server. To restore the IAS settings from the text file you created, simply run the following command assuming the correct path and file name.
netsh exec c:IAS.txt
This makes it easy to rapidly deploy multiple redundant IAS RADIUS servers and it also gives you the peace of mind to rapidly repair an IAS server.
Router Side Configuration:
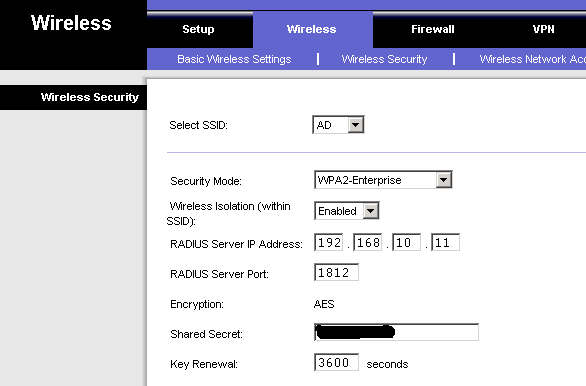
Figure WWW
Client Side Configuration:-
Login to a Windows XP Professional machine which is added to the Domain.
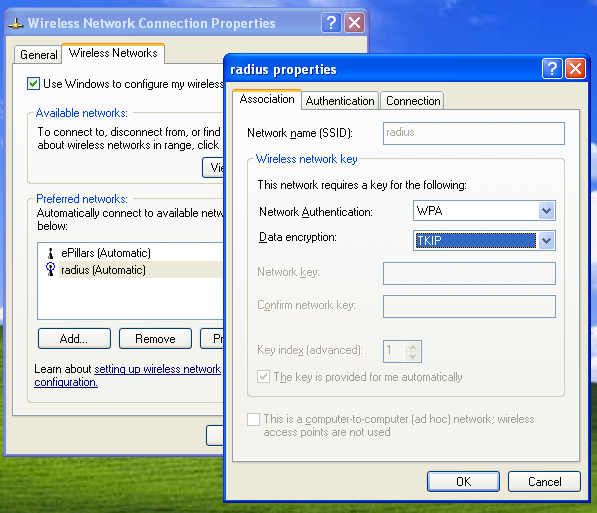
Right Click My Network Places > Right Click Wireless Network Connection>Properties

wireless network connection properties
Figure XXX
Click Wireless Networks Tab
Select RADIUS configured SSID(Refer Figure WWW) and click properties.
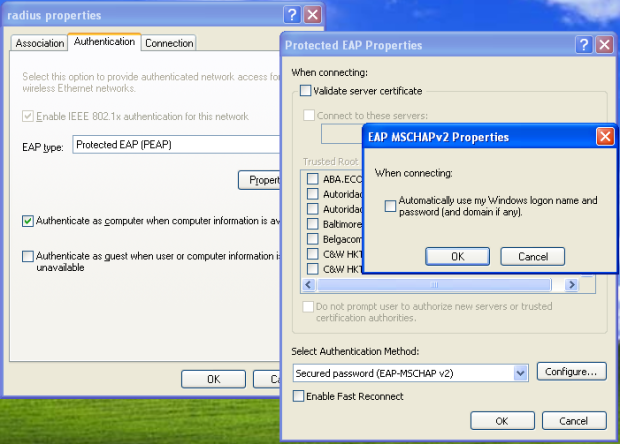
Click Authentication Tab
Select EAP type as Protected EAP(PEAP)
Click Properties
If you are not installing certificate in client machine
remove tick mark from Validate server certificate.
Select Secured password(EAP-MSCHAP v2) as Authentication Method.
Click Configure and remove tick mark from “Automatically use my Windows logon name and password”
if are not logged into domain.
Click OK in all windows.
Try to connect Wireless network.
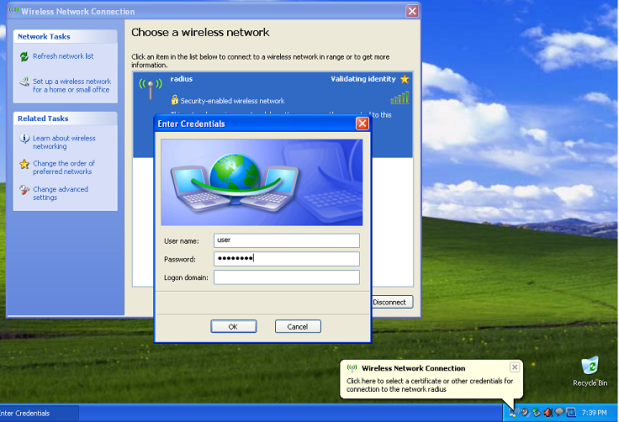
Enter domain user name and password .
Use Event Viewer in AD for troubleshooting

